
I really like Capistrano.
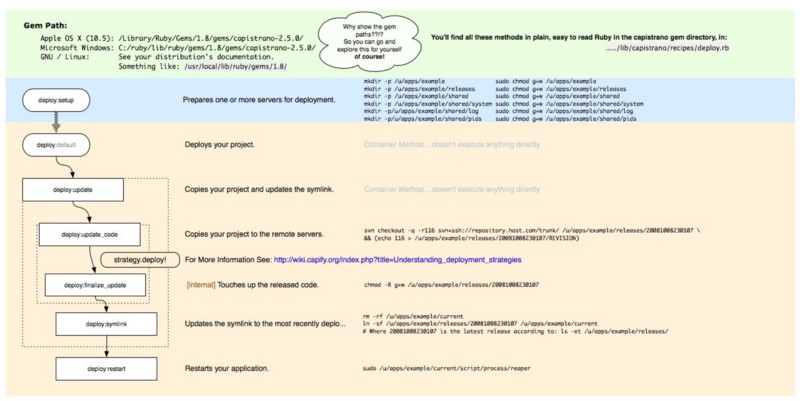
Capistrano is a deployment gem for Ruby which helps you manage migrations, deployments, applications, etc on all of your many servers. It excels at keeping many servers in sync and managing complex multi-application deployments. If you are a ruby-on-rails developer, you probably already use Capistrano.
I have been working on node.js applications lately, and I was missing the simplicity of Capistrano deployments, so I wondered how hard it would be to use Capistrano to manage a node.js application. It turns out that it is fairly easy!
This guide assumes that you already have your server set up (node installed, npm installed, database installed, etc), but you can of course manage this with Capistrano as well. An important note is that you do not need to install ruby on the servers you are deploying to, just your local development environment.
I’m going to assume you also have a version of Ruby installed (ships with all modern OSX versions). Step one is installing Capistrano (gem install capistrano). Gems are like npm packages if you aren’t familiar with ruby. You may need to be root to do this (sudo gem install capistrano), but I recommend using rbenv a great ruby version manager.
To get rbenv up and running, here are the tl;dr steps (I’ll write a longer post on rbenv vs rvm in the future, but this is the "least scary" way to have custom versions of ruby installed at the user-level)
Install rbenv for OSX:
( Homebrew: https://github.com/mxcl/homebrew/wiki/installation )
Install rbenv brew install rbenv
Install ruby-versions brew install ruby-build
Install a ruby version
Set your global rbenv version
Set up some handy bash aliases for running ruby apps:
export PATH="$HOME/.rbenv/bin:$PATH
"
eval "$(rbenv init -)"
alias r="rbenv exec "
alias rb="rbenv exec bundle exec "
exec $SHELL
Run your apps with rbenv
r gem install bundler
r bundle install
Now, rather than worrying about being root or messing with your system-level ruby and gems, you can just run r and then your command in ruby user space! I’m using r as shorthand for rbenv exec, as setup in my bash configuration steps above.
OK, we have Capistrano installed, now we need to set up a few files in our node project. Luckily this is as simple as typing r capify . in the project directory’s root. The capify command will set up a few files and folders in your project. You don’t need to worry about Capfile (which is used by the Capistrano command later to initialize itself), but ./config/deploy.rb is where we will be building our custom deployment setps.
The one tricky thing with node.js applications is that by default they expect to be run within a console. This means that it can be hard to daemonize them (running head-less), which is what you want on a production web server. However, the fantastic package Forever does exactly this for us. Forever monitors and logs your application, as well as creating handy start and stop wrappers for your project. Ensure that you have forever installed (npm install forever) and that it is listed in your package.json. Forever can be installed globally (so you have handy access to the ‘forever’ command), but I’ll be using it locally to minimize the chance of conflicts.
So now we have Capistrano and Forever installed. We need to create some new deployment tasks in ./config/deploy.rb to tell Capistrano exactly what we want it to do when we deploy. Here is my skeleton deploy.rb:
set :application, "MY_APPLICATION"
set :repository, "git@github.com:PATH_TO_MY_REPO"
set :scm, :git
set :use_sudo, false
set :keep_releases, 5
set :deploy_via, :remote_cache
set :main_js, "MAIN_APP.js"

desc "Setup the Demo Env"
task :demo do
  set :branch, 'develop'
  set :domain, 'MY DEMO SERVER'
  set :user, 'MY SSH USER'
  set :applicationdir, "/home/#{user}/deploy/#{application}"
  set :deploy_to, applicationdir
  ssh_options[:keys] = ["/path/to/my/ssh.pub"]

  server 'MY DEMO SERVER', :app, :web, :db, :primary => true
end

desc "Setup the Production Env"
task :production do
  set :branch, 'master'
  set :domain, 'MY PROD SERVER'
  set :user, 'MY SSH USER'
  set :applicationdir, "/home/#{user}/deploy/#{application}"
  set :deploy_to, applicationdir

  server 'MY PROD SERVER', :app, :web, :db, :primary => true
end

namespace :deploy do

  before 'deploy:start', 'deploy:npm_install'
  before 'deploy:restart', 'deploy:npm_install'
  # before 'deploy:default', 'deploy:setup'

  after 'deploy:create_symlink', 'deploy:symlink_node_folders'
  after 'deploy:setup', 'deploy:node_additional_setup'

  desc "START the servers"
    task :start, :roles => :app, :except => { :no_release => true } do
    run "cd #{applicationdir}/current/ && node_modules/.bin/forever start #{main_js}"
  end

  desc "STOP the servers"
    task :stop, :roles => :app, :except => { :no_release => true } do
    run "cd #{applicationdir}/current/ && node_modules/.bin/forever stop #{main_js}"
  end

  desc "RESTART the servers"
    task :restart, :roles => :app, :except => { :no_release => true } do
    run "cd #{applicationdir}/current/ && node_modules/.bin/forever restart #{main_js}"
  end

  task :symlink_node_folders, :roles => :app, :except => { :no_release => true } do
    run "ln -s #{applicationdir}/shared/node_modules #{applicationdir}/current/node_modules"
  end

  task :node_additional_setup, :roles => :app, :except => { :no_release => true } do
    run "mkdir -p #{applicationdir}/shared/node_modules"
  end

  task :npm_install, :roles => :app, :except => { :no_release => true } do
    run "cd #{applicationdir}/current/ && npm install"
  end

  task :npm_update, :roles => :app, :except => { :no_release => true } do
    run "cd #{applicationdir}/current/ && npm update"
  end

end

task :tail do
  resp = capture "cd #{applicationdir}/current/ && node_modules/.bin/forever logs | grep #{main_js}"
  log = resp.split(" ").last
  log.gsub!("\e[35m", "")
  log.gsub!("\e[39m", "")
  run "tail -f #{log}"
enYou can see that we have custom start, stop, and restart commands which Capistrano’s normal deployment tasks will use. You can also of course call these tasks directly if you want to restart your servers.
Other than the wrappers for Forever, I also chose to symlink my node_modules directory to a common place. This will allow me to share my packages between deploys (which are all deployed in separate folders, but symlinked to "current") which will make subsequent deployments really fast.
Now you can use Capistrano very simply to check out new code from GitHub, make a new folder to hold the new code, run any npm updates, stop the old server, and start a new one with one simple command: r cap demo deploy. You will note that we have tasks called "demo" and "production". These tasks just set variables (like git branch names and a list of servers) so that subsequent commands can use them. Commands are run in sequence in Capistrano.
I also created one more command called "tail" which is a quick way for me to tail the output of my application which Forever is smart enough to capture and store in a log file for me. To monitor my demo server, it would be "r cap demo tail". This will run until I close it.
For my node.js deployments, I have node.js listen on port 8080 and use haproxy to route that to port 80. Other folks like to use nginx and sockets to route their app to the normal web ports. Either way, it is best to NOT run your node app as root (which is required if you want to listen on port 80). If you do want to do this, you will need to use Capistrano’s try_sudo command to run the start/restart scripts as root.
The power of Capistrano becomes even more obvious when you have many servers. Just keep adding ‘server’ with distinct roles. You will note that tasks you create will only be executed on servers with specific roles, so you can carefully manage your deployment.
There are many grate Capistrano resources out there (including many awesome extensions for controlling EC2 servers, logging, etc) and now you can use them all with your node.js apps!
Originally published at 04 Apr 2012